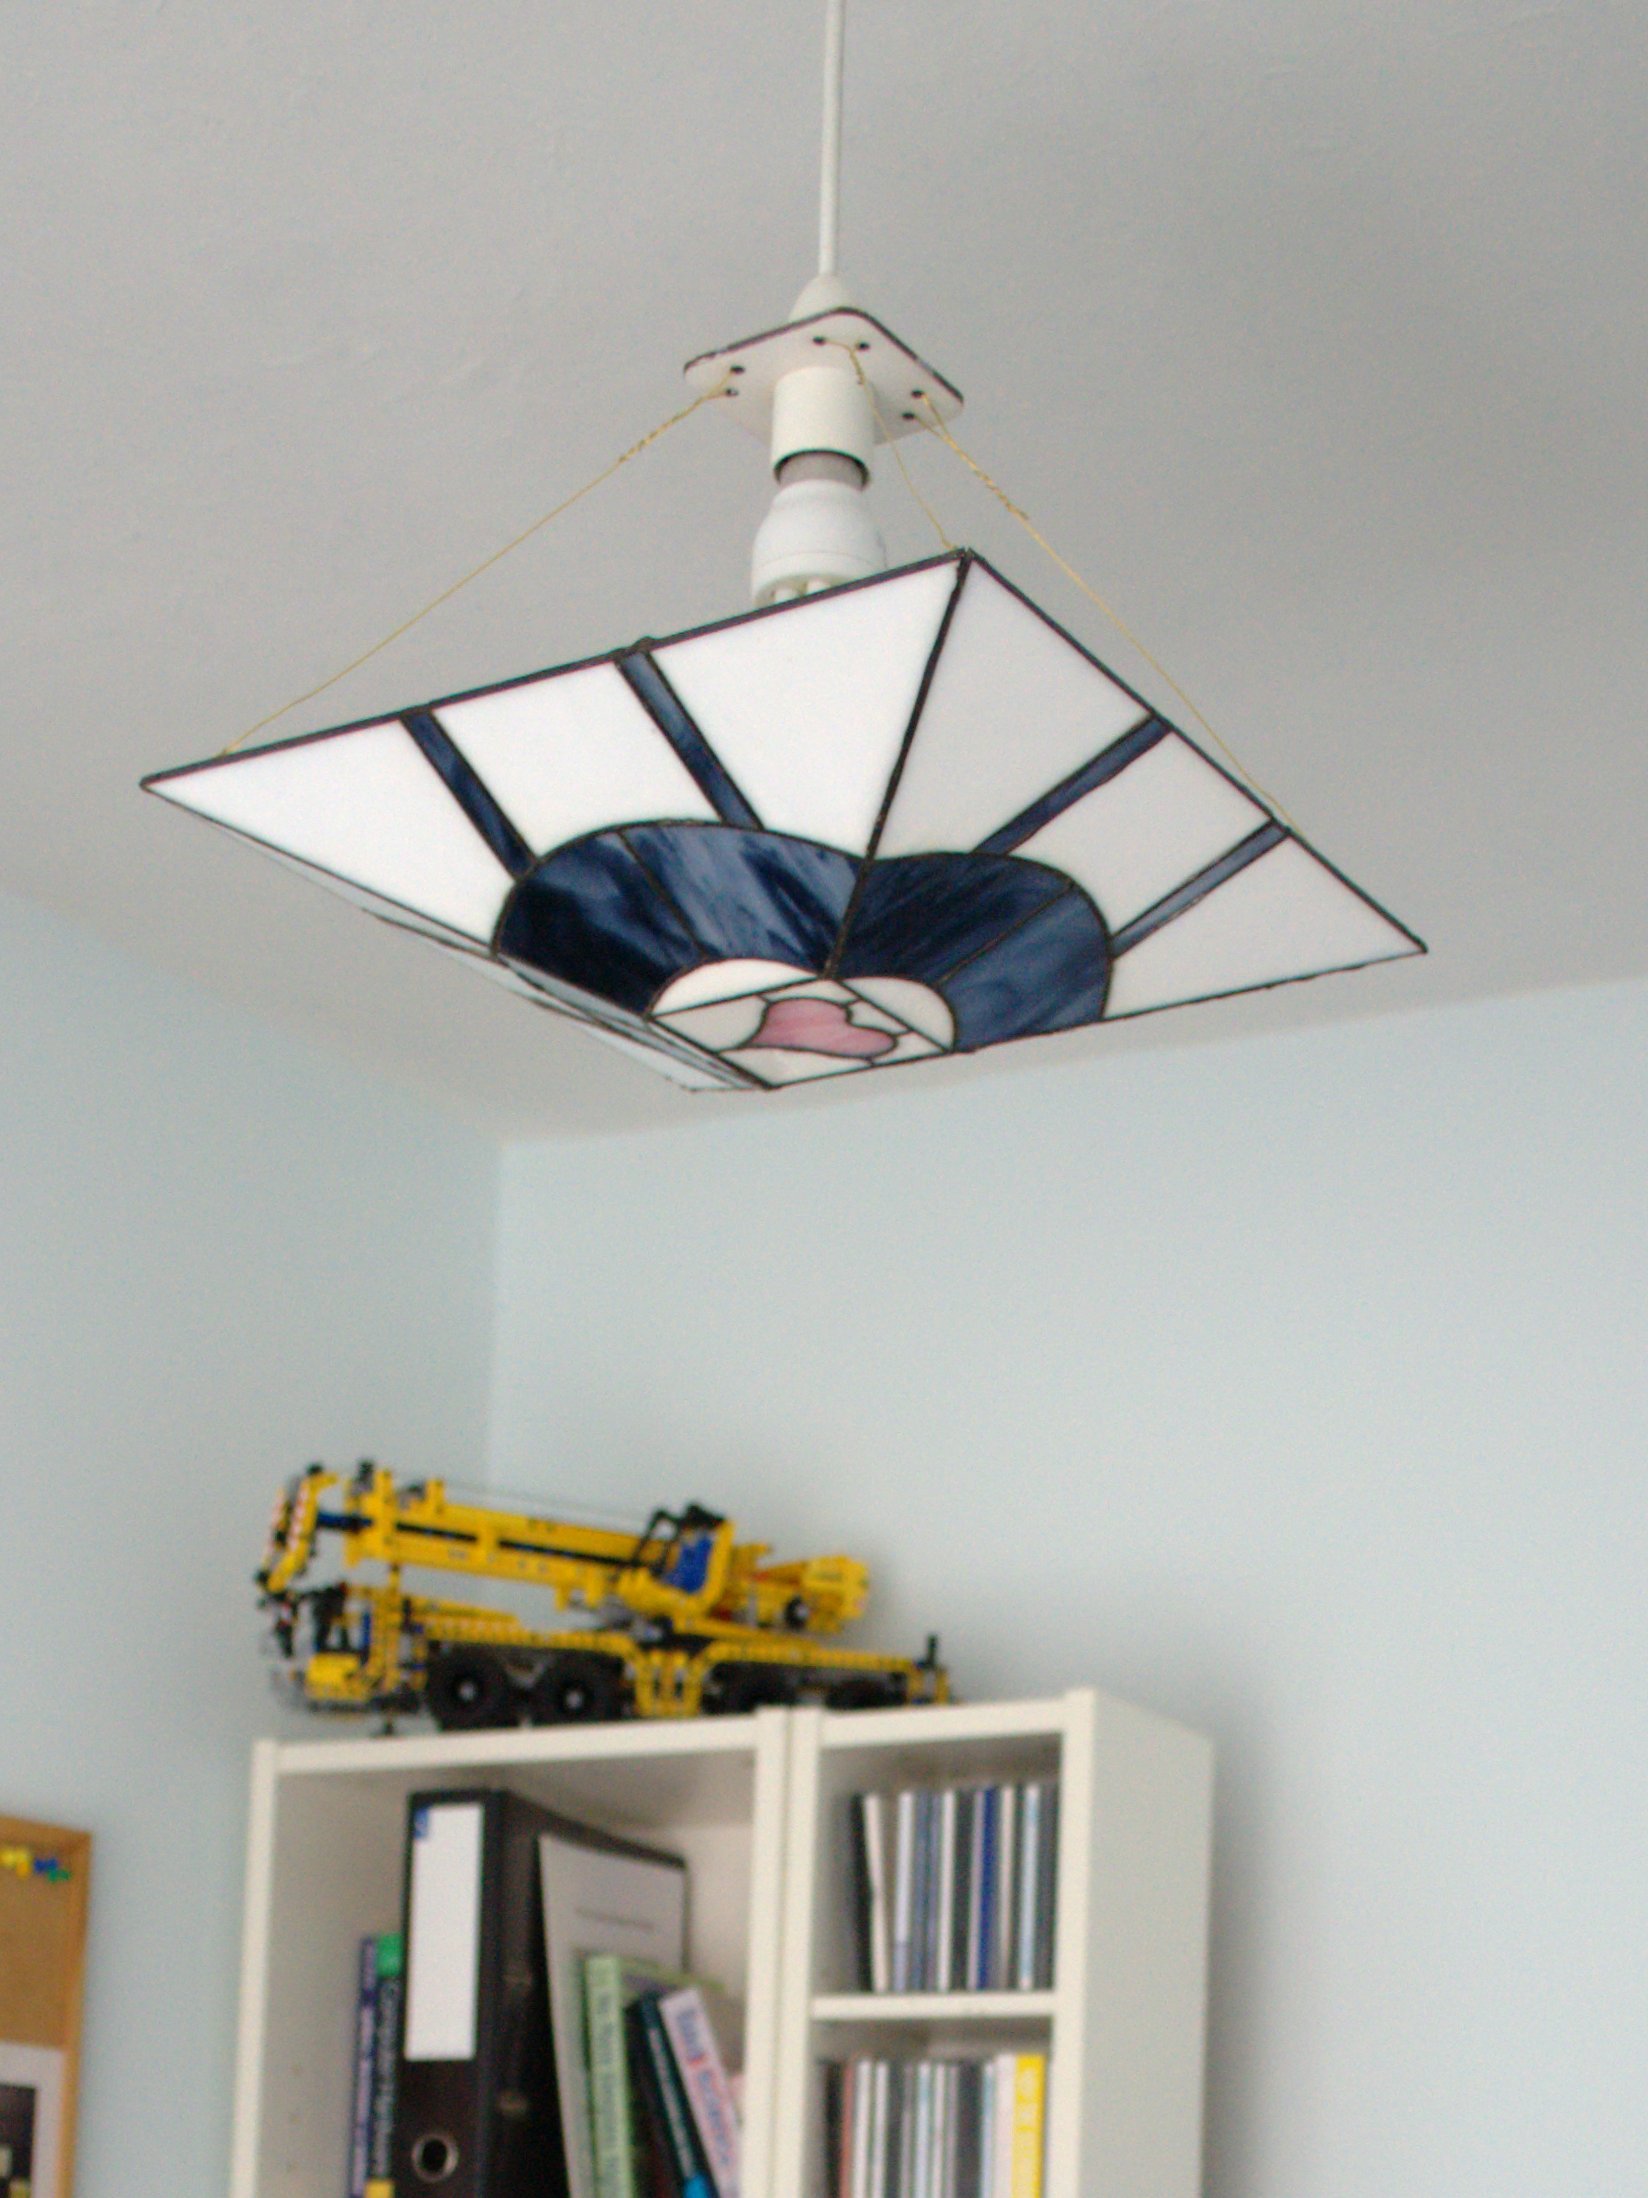
Well who doesn’t want a Weighted Companion Cube? I realise it’s not the most innovative design but it’s nice and simple, and I like the fact that it hangs over my head. It also goes with my Aperture Science logo.
This took a surprisingly long time to make, as I started this in March 2014 and only finished it in August. However this was mainly due to not actually working on it in April-July as I couldn’t decide exactly how I was going to attach the lampshade to the pendant once I’d made it, which demotivated me slightly.
However I did finally finish it. It’s a weighted companion cube uplighter, which I sit directly under at my computer now. The first evening was spent just doing the design and working out how to have a 3D object that gives a 2D projection of a circle – I’m not good at drawing a circle at the best of times! After looking at the calculations for bisecting cylinders to calculate ellipses and getting a bit confused I realised I wouldn’t be able to draw an ellipse without using graphing software and came to the conclusion instead that if I just worked out where this ellipse would intersect the straight lines on the design then I could add curves to fit that. This was much quicker.
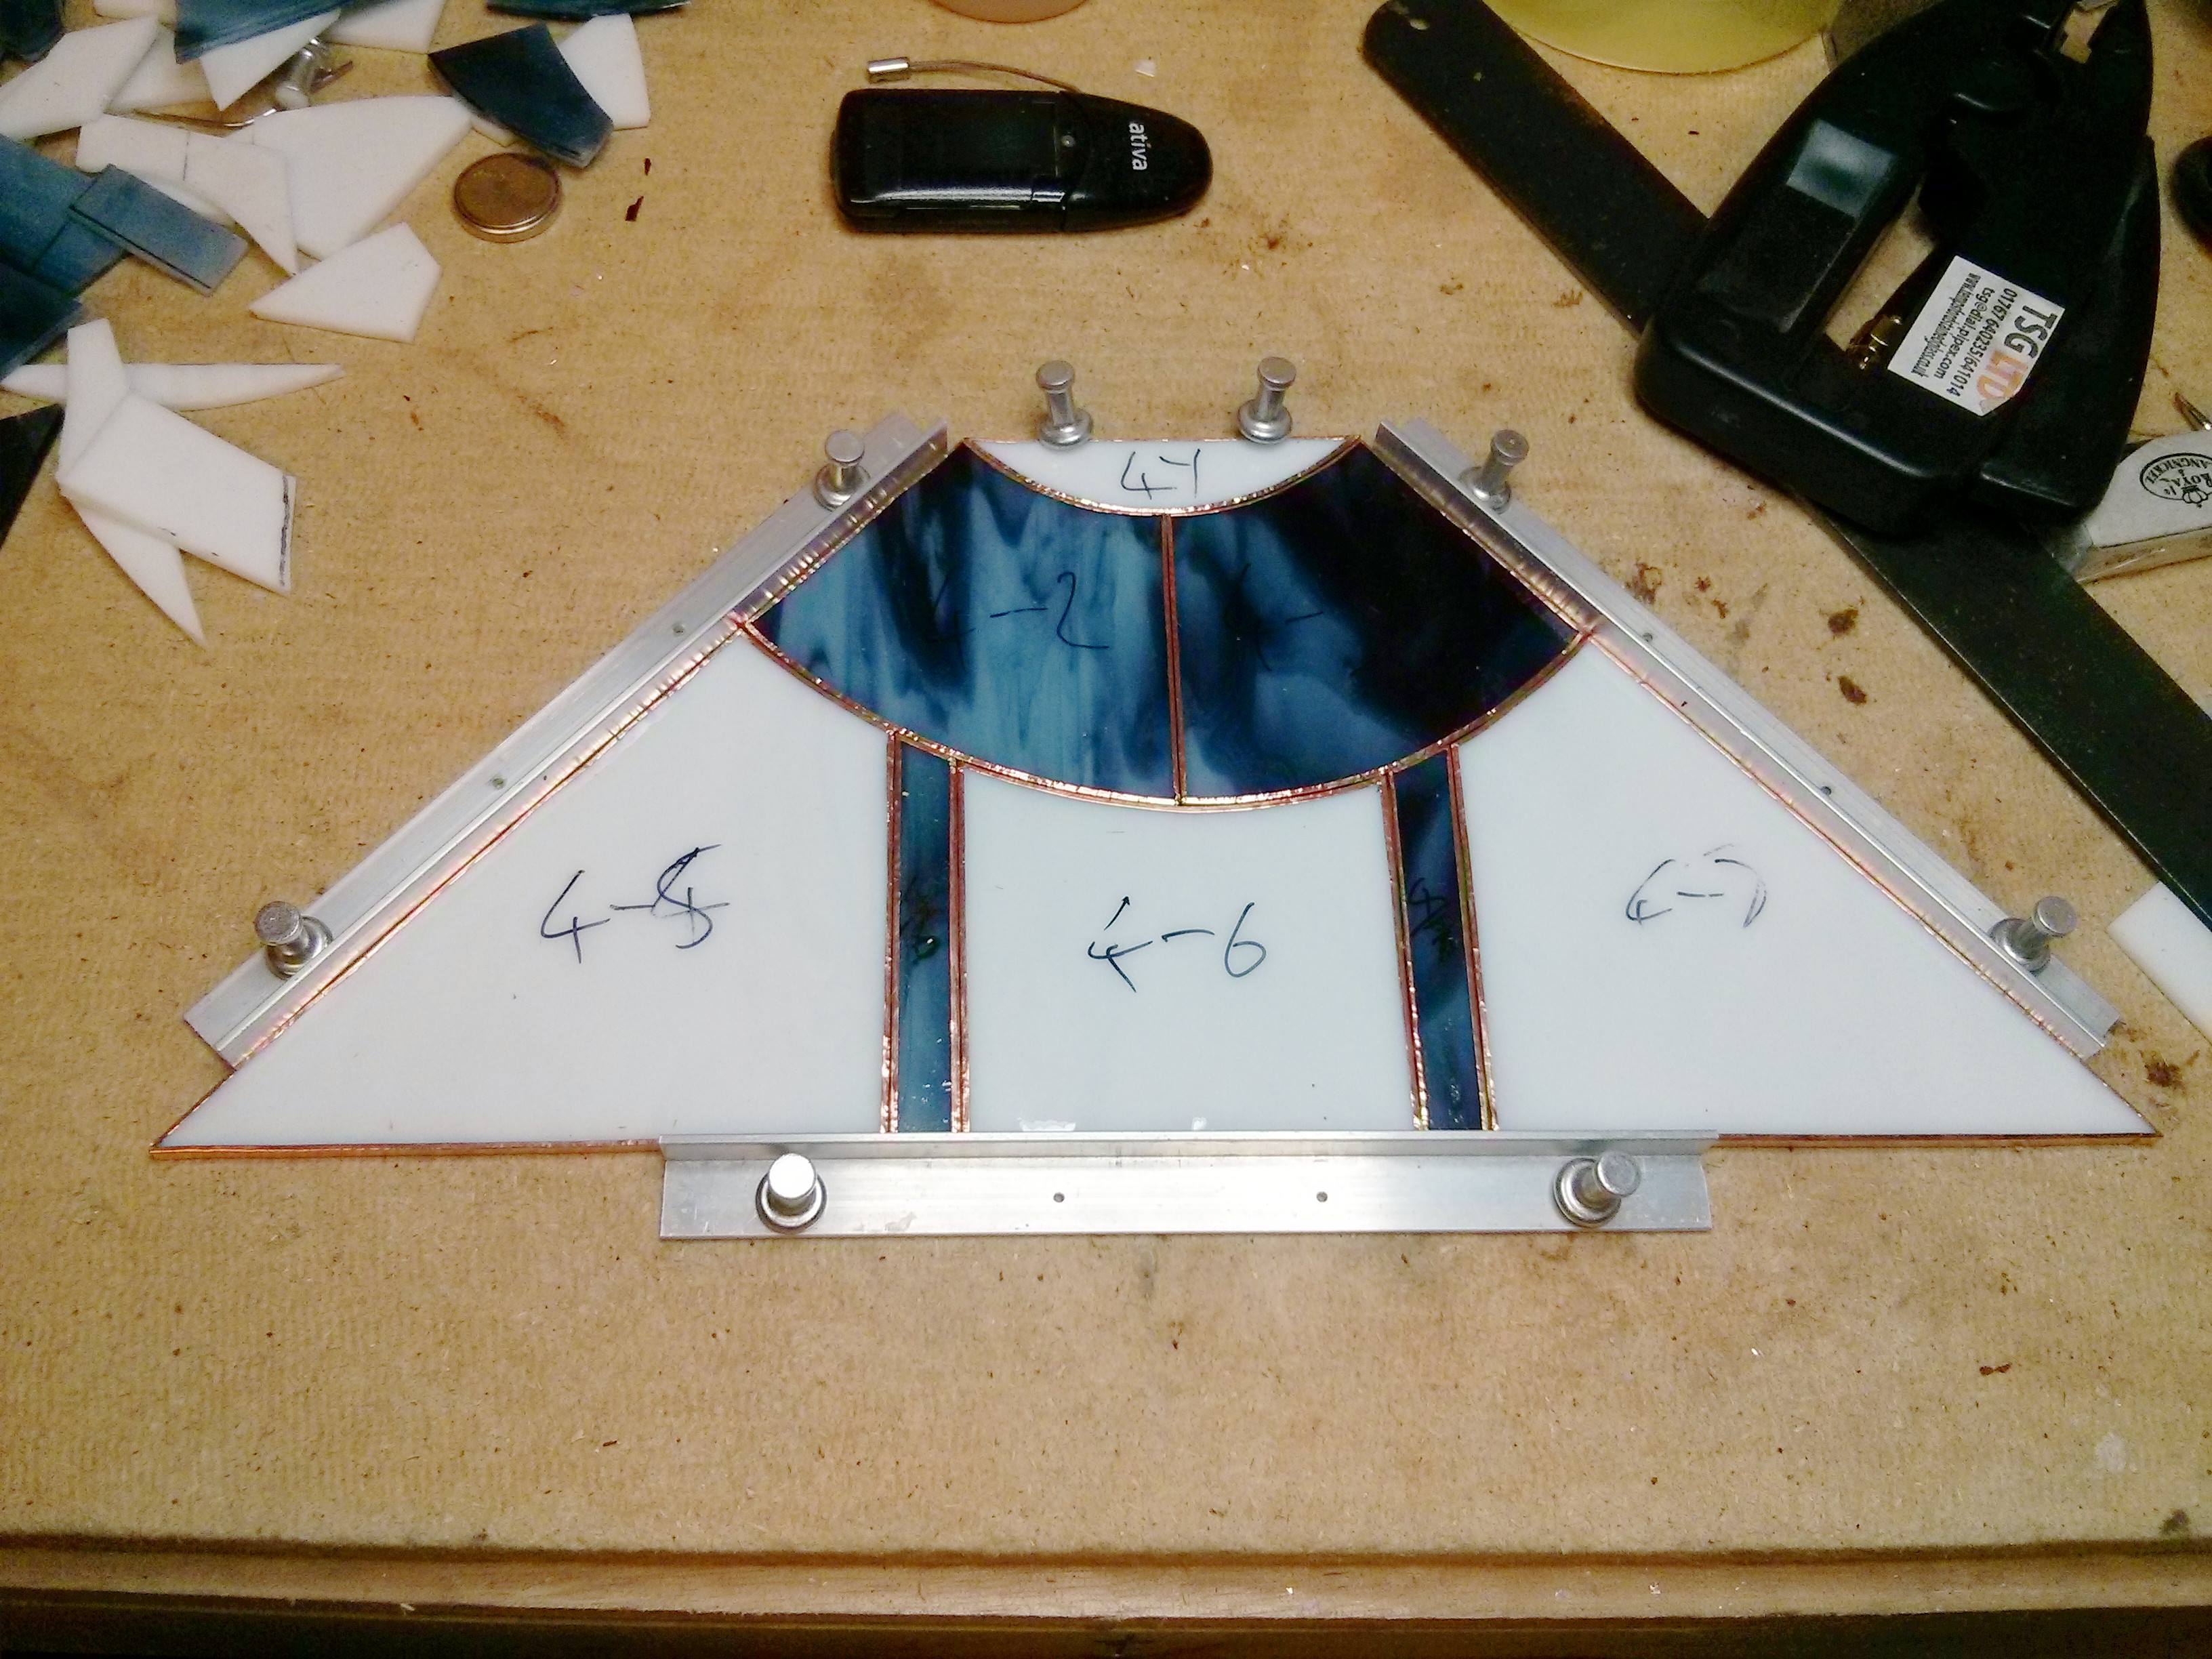
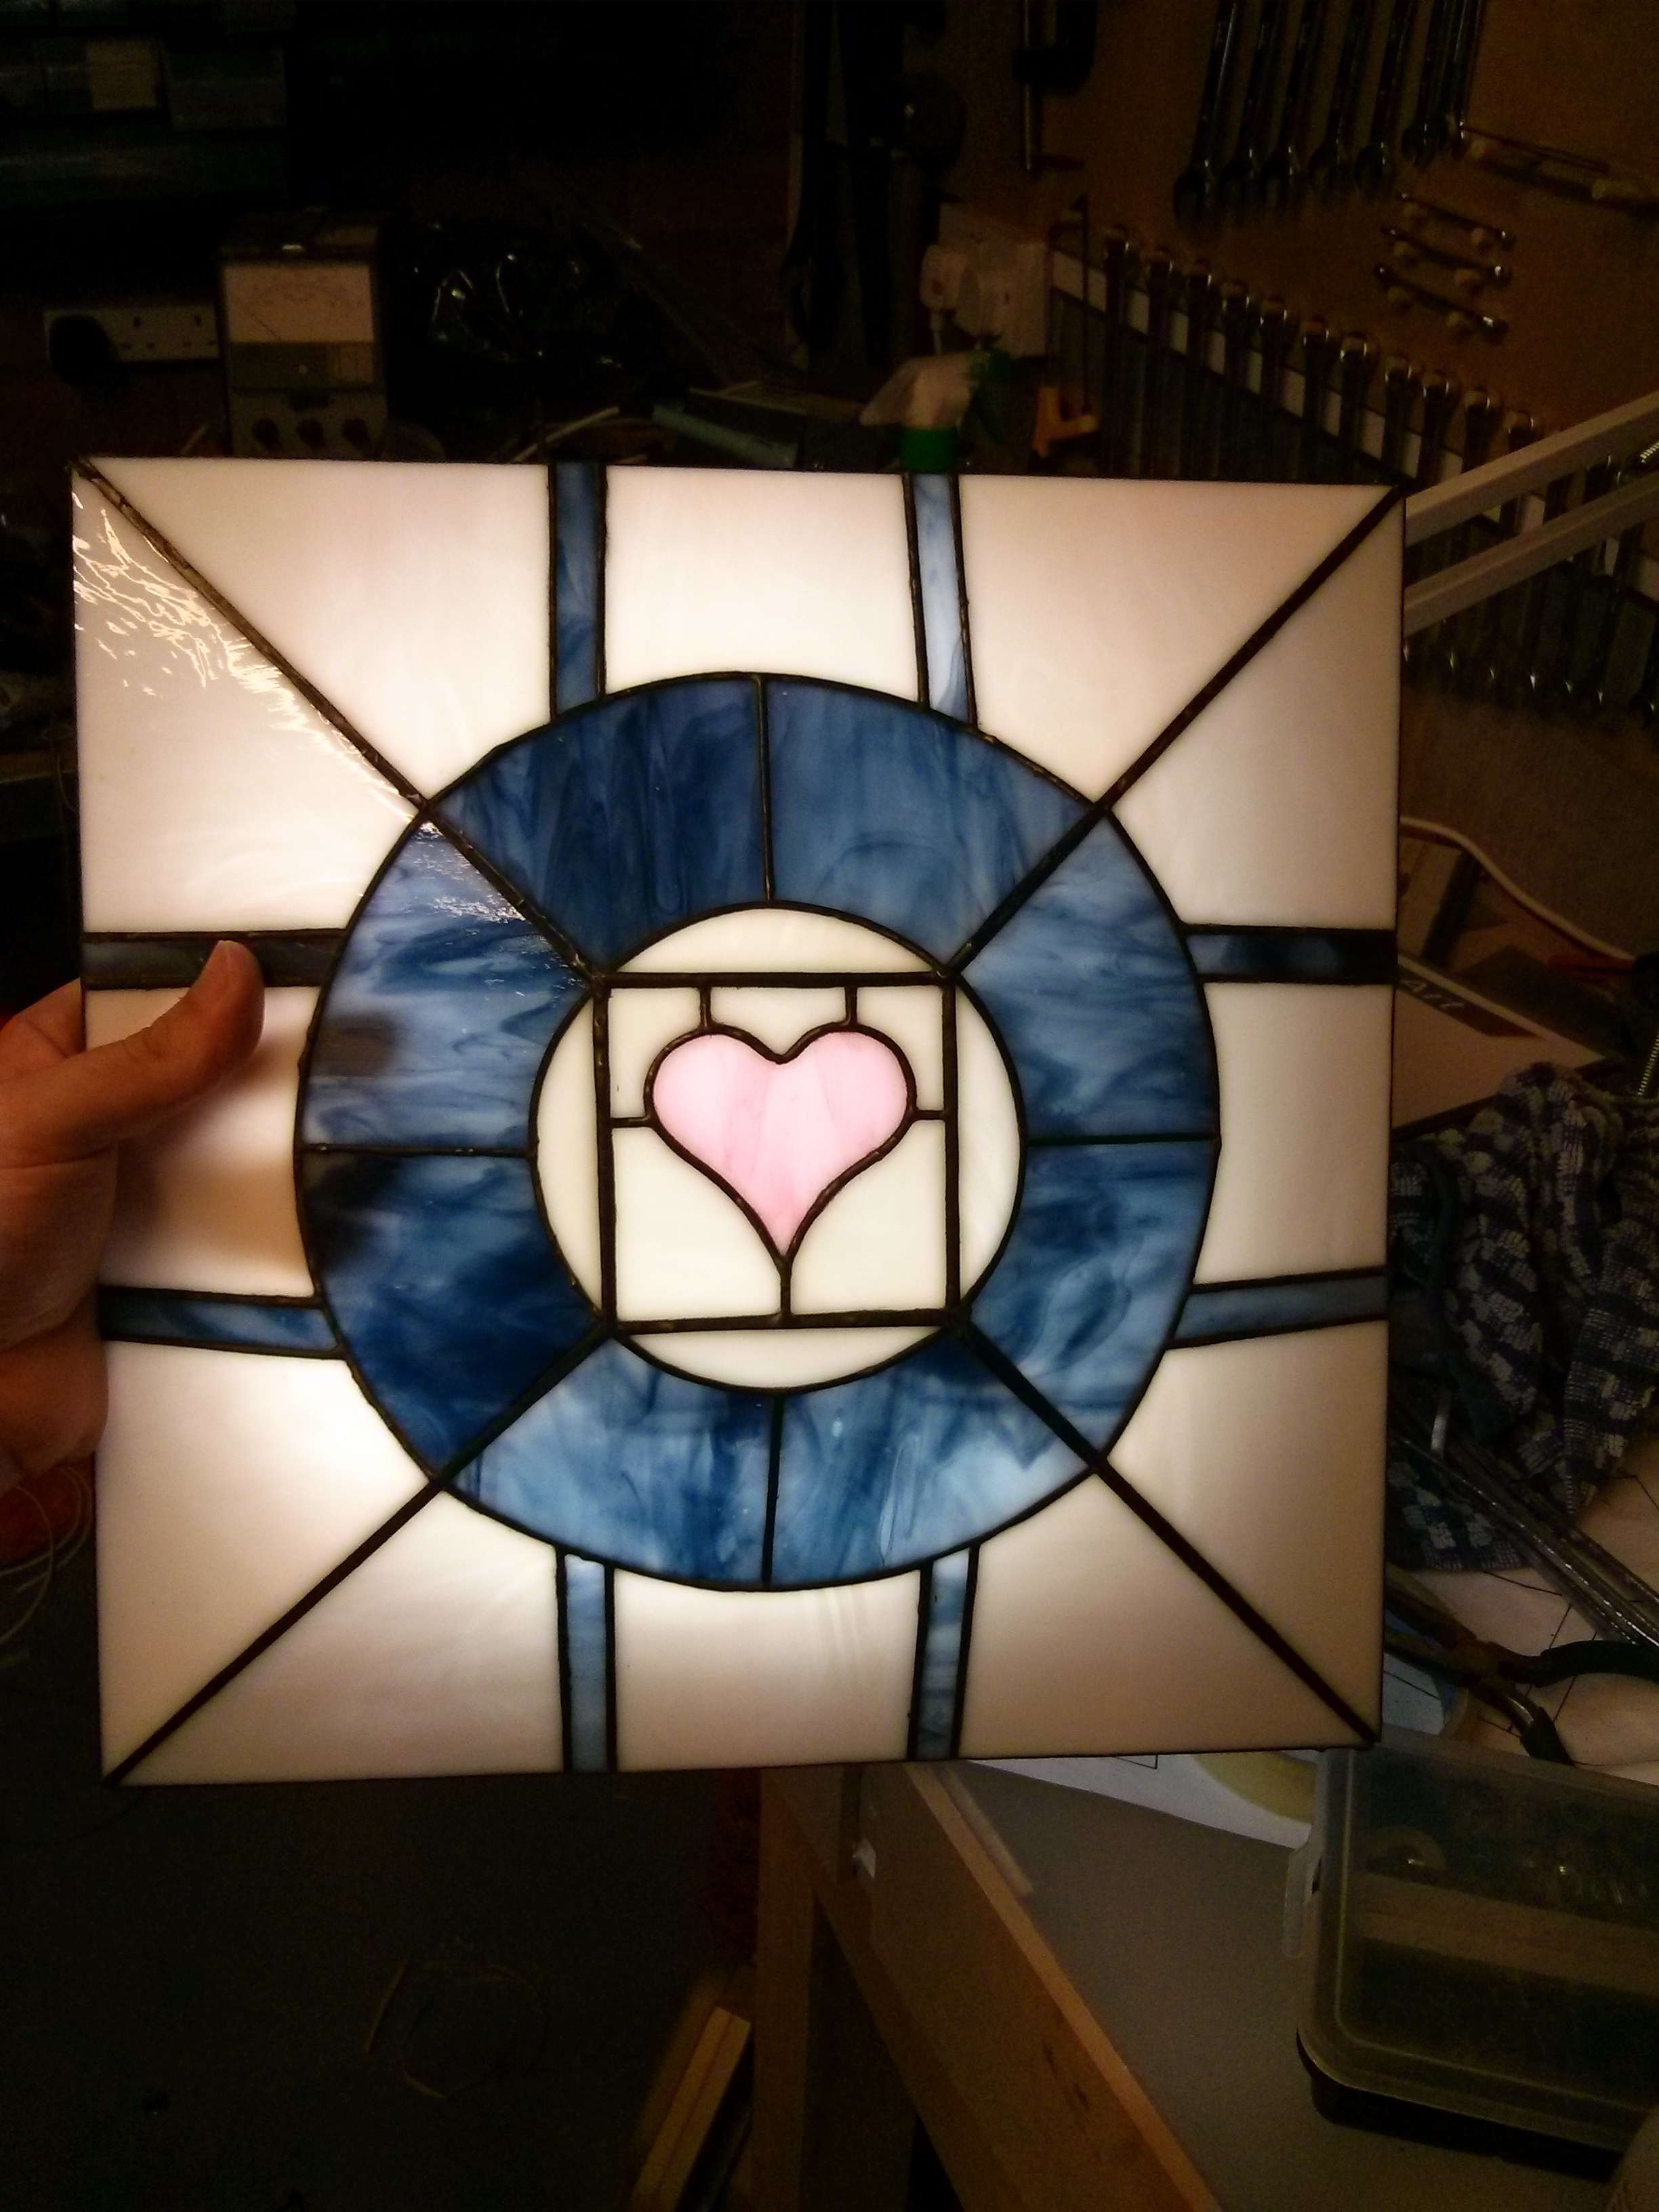
I cut the heart centre out and foiled and soldered that first. I then cut each side, checked they were all around the same size and the lines matched up where they crossed panels (apart from on the 4th side back to the first side and it shows argh argh). I then attempted to perform some mitring on the joining sides. I didn’t measure this, just trying to remove inner corners. I’m not entirely sure whether this was a good idea. I then foiled and soldered each panel individually, before assembling them. This was where I discovered the centre was now slightly too large for the sides and caused small gaps to left in the joins. Make the centre last next time!

I’m using 50/50 solder for this lamp as it’s a bit stronger and even if it was a less pretty finish it’s patina’d and pretty high up. So I used tape to hold the panels in position and then soldered them together. I think this would have been easier with a mould to balance on as it might have stopped the solder dripping inside, although to be honest the amount of solder wasted is relatively low compared to the time needed to make a mould.
I then cut some loops of wire and soldered them into the top of each corner seam to hold it up. I washed it, removed all the solder balls and splashes (more than usual because it was 3D maybe?) then applied patina, waited and then washed it again. I’m definitely pleased with the patina effect again, I think it makes the white panels glow even with no light behind them.
To actually turn it from an attractive-but-non-food-safe bowl into a lamp I designed and laser-cut a plate from 3mm birch ply with a 1 1/8 circle for the pendant thread and 4 pairs of 3mm holes. Nice mixing of measurement systems! The 3mm holes I then glued metal M3 washers to ensure the brass picture wire I used to hold the glass wouldn’t cut the wood. A sand and spray-paint later and it looks good enough.
The spray-can actually turned out to be a good enough height to use to hold the plate in place while I tightened the brass wire in pairs to hold the lampshade. Assistance was required at this point as 5 or 6 hands are needed. Currently the wire is just twisted in place, I might have a look at getting some crimps to reinforce those if they look like they’re fraying over time.